It’s that easy: a few clicks and you get a Lightweight Kubernetes cluster!
I needed a local sandbox for ElasticSearch and Kibana for some learnings. I could as well use a docker-compose file, but I thought I’d give it a try and spin it up directly in a Kubernetes sandbox. The only pre-requisite is having open source Rancher Desktop by SUSE on your machine. You can configure: virtual machine resources, Kubernetes version, to expose services or not using Traefik, container engine - either containerd(hereby tutorial) or docker/moby. Kubernetes installation is based on Lightweight Kubernetes (k3s). After enabling Kubernetes, you get a single node cluster and all the command line tools you need to deploy apps to it (kubectl/nerdctl/helm).
➜  ~ kubectl top nodes
NAME                   CPU(cores)   CPU%   MEMORY(bytes)   MEMORY%
lima-rancher-desktop   1190m        19%    9912Mi          61%
➜  ~
[Listing: node sizing and resource usage after deployment of both ElasticSearch cluster and Kibana]
Other feature of Rancher Desktop I like is the integrated image scanning for vulnerabilities.
Installing ElasticSearch Cluster
I used Bitnami ElasticSearch and for that it is needed that your Helm installation can search the Bitnami repo:
➜  ~ helm repo add bitnami https://charts.bitnami.com/bitnami
"bitnami" has been added to your repositories
➜  ~ helm repo update
If you have access to multiple Kubernetes clusters, make sure to select the rancher-desktop context, before creating a namespace - hereby elk - to contain and isolate your ElasticSearch cluster deployment,
as below:
➜  ~ kubectl config use-context rancher-desktop
Switched to context "rancher-desktop".
➜  ~ kubectl create ns elk
namespace/elk created
➜  ~  helm upgrade --install elasticsearch --namespace=elk --set master.replicaCount=3 bitnami/elasticsearch
Release "elasticsearch" has been upgraded. Happy Helming!
NAME: elasticsearch
LAST DEPLOYED: Sun Jan 15 20:36:44 2023
NAMESPACE: elk
STATUS: deployed
REVISION: 2
TEST SUITE: None
NOTES:
CHART NAME: elasticsearch
CHART VERSION: 19.5.8
APP VERSION: 8.6.0
Above deployment using prebuilt helm chart the result is an Elasticsearch cluster named elastic (default for clusterName config value) with nine pods:
- three master-eligible nodes responsible for lightweight cluster-wide actions such as creating or deleting an index, tracking which nodes are part of the cluster, and deciding which shards to allocate to which nodes.
- two data nodes that hold the shards containing the indexed documents. As they handle data related operations that are I/O-, memory-, and CPU-intensive, it is important to be monitored and scaled up on overload.
- two ingest nodes that transform and enrich the document before indexing. This node role is required and makes sense only with heavy ingest load via pipelines and/or monitoring.
- two coordinating only nodes that need to have enough memory and CPU in order to deal with the gather phase. Essentially coordinating only nodes behave as smart load balancers: route client search requests, handle the search reduce phase, and distribute bulk indexing. Implicitly every node in the cluster has a coordinating node role, and coordinating only nodes benefit only for large clusters, by offloading the coordinating node role from data and master-eligible nodes.
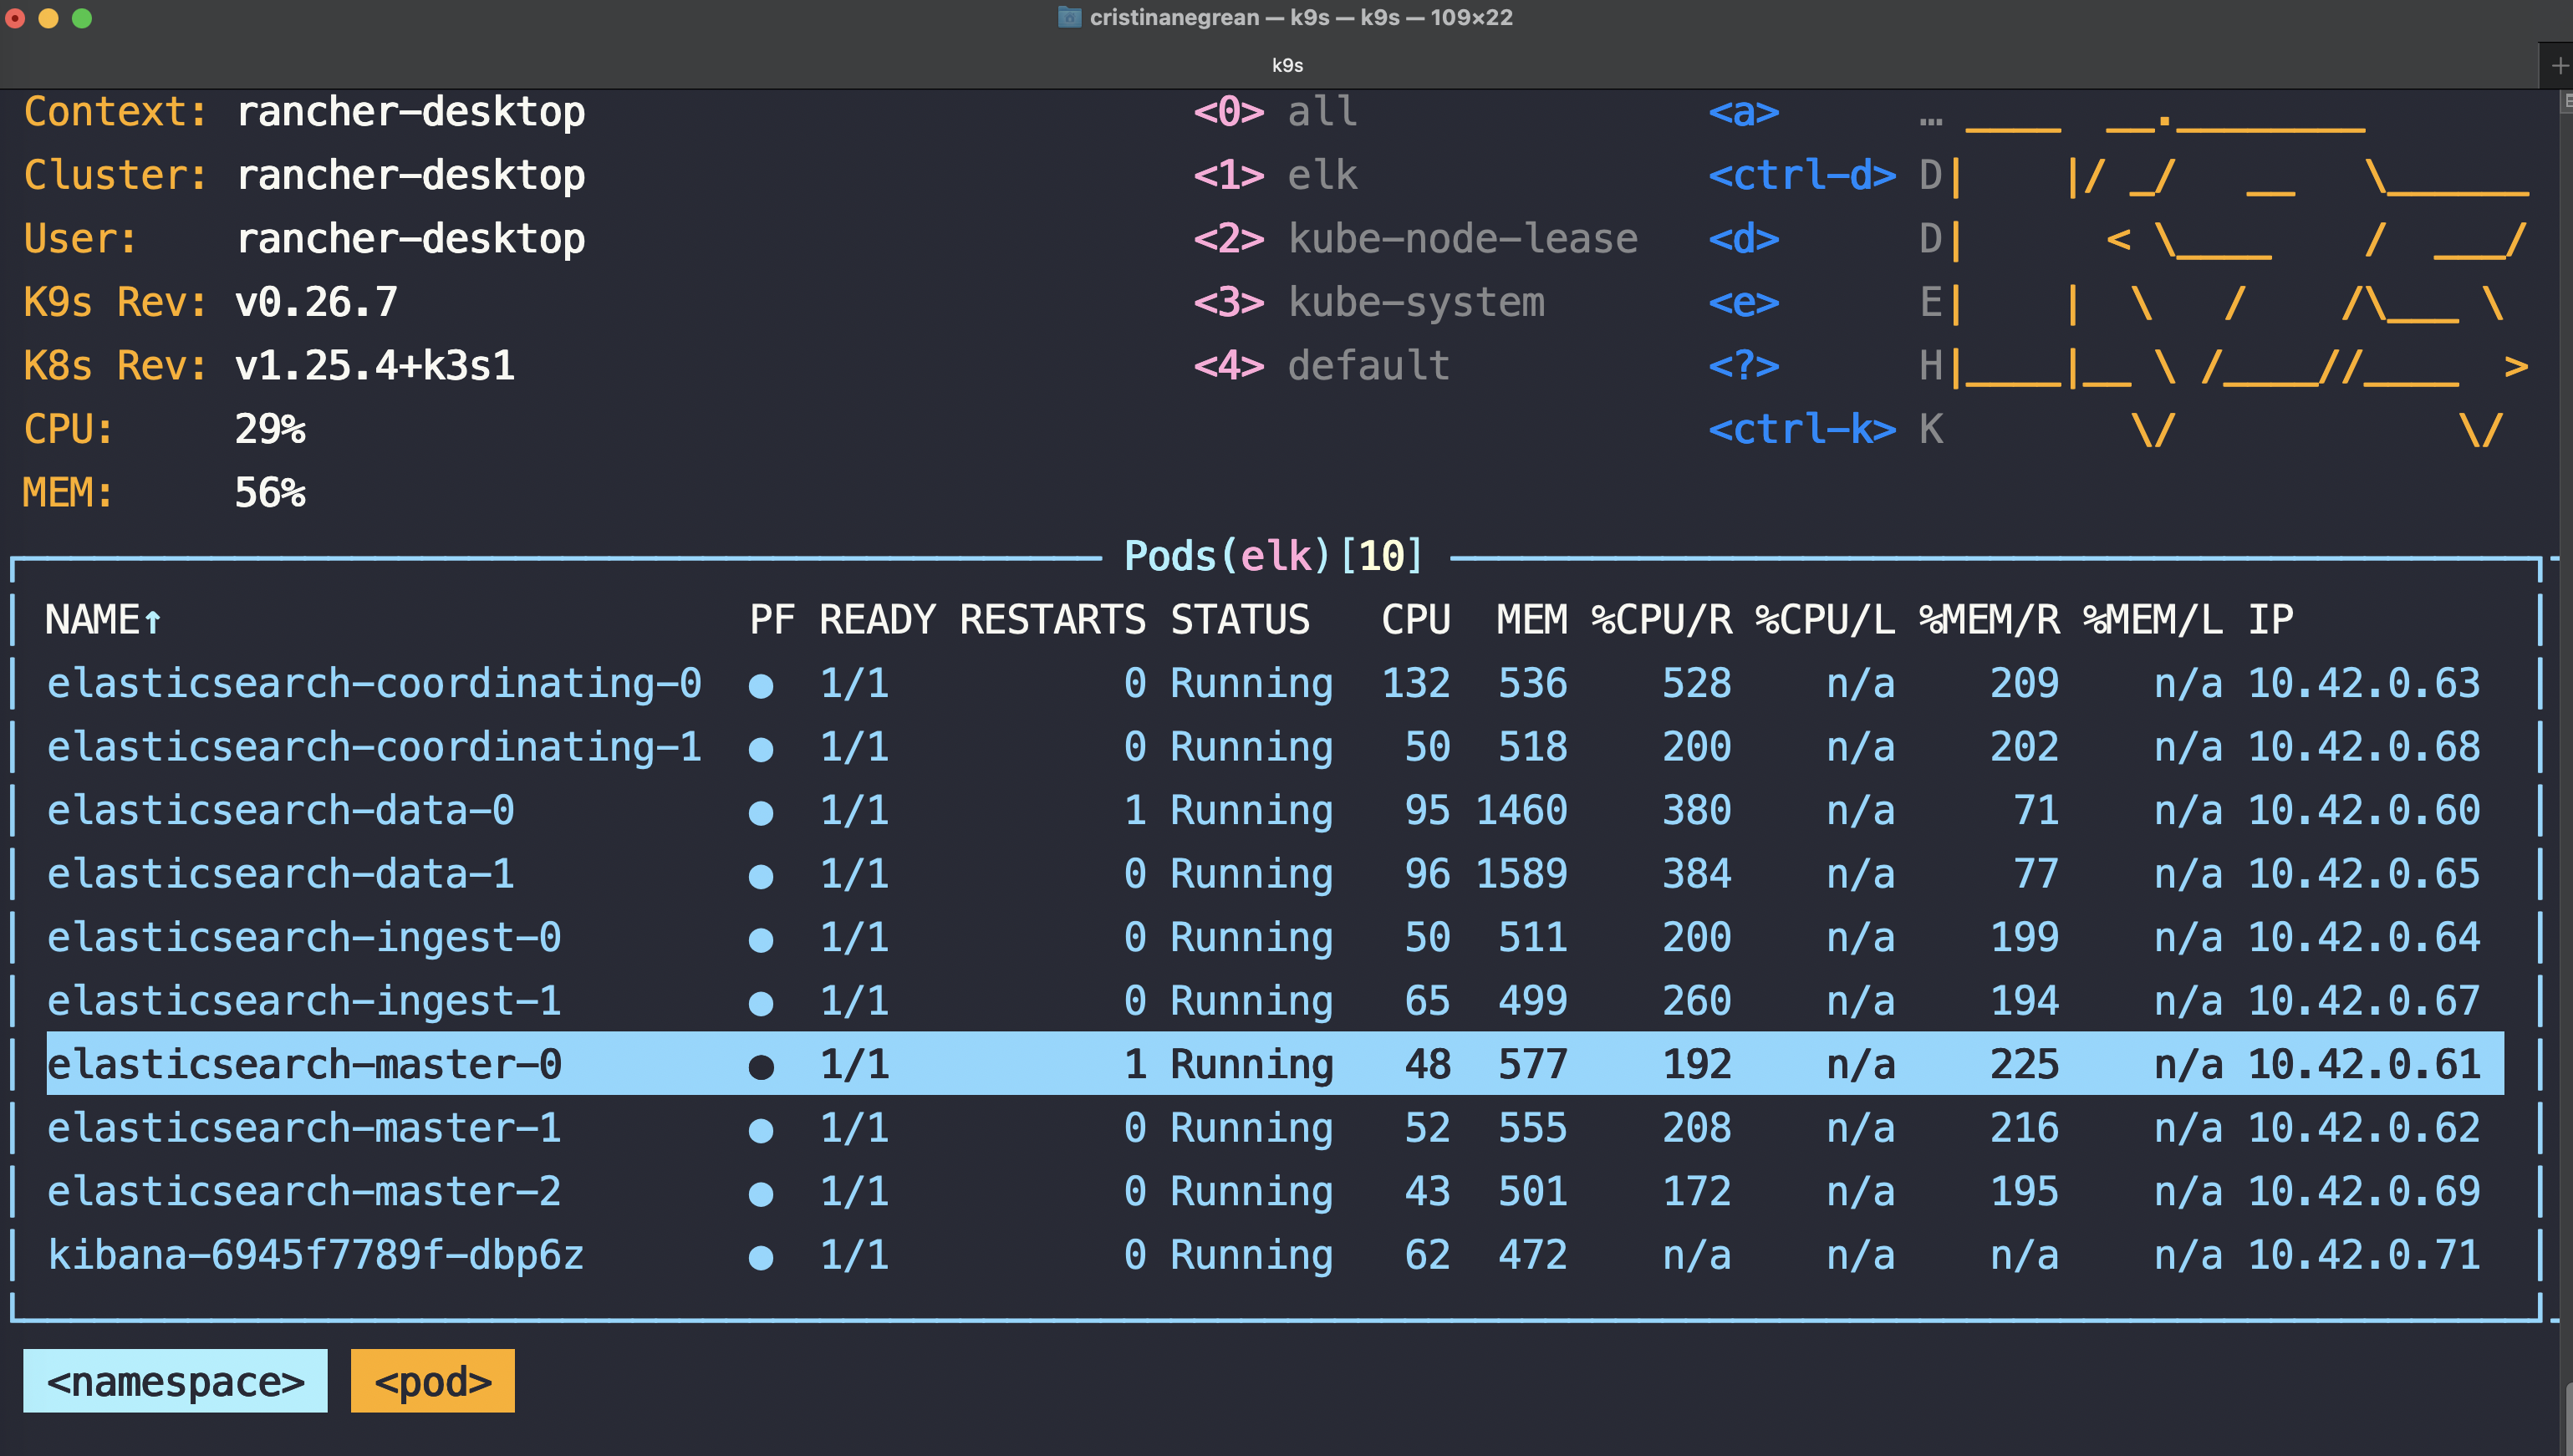
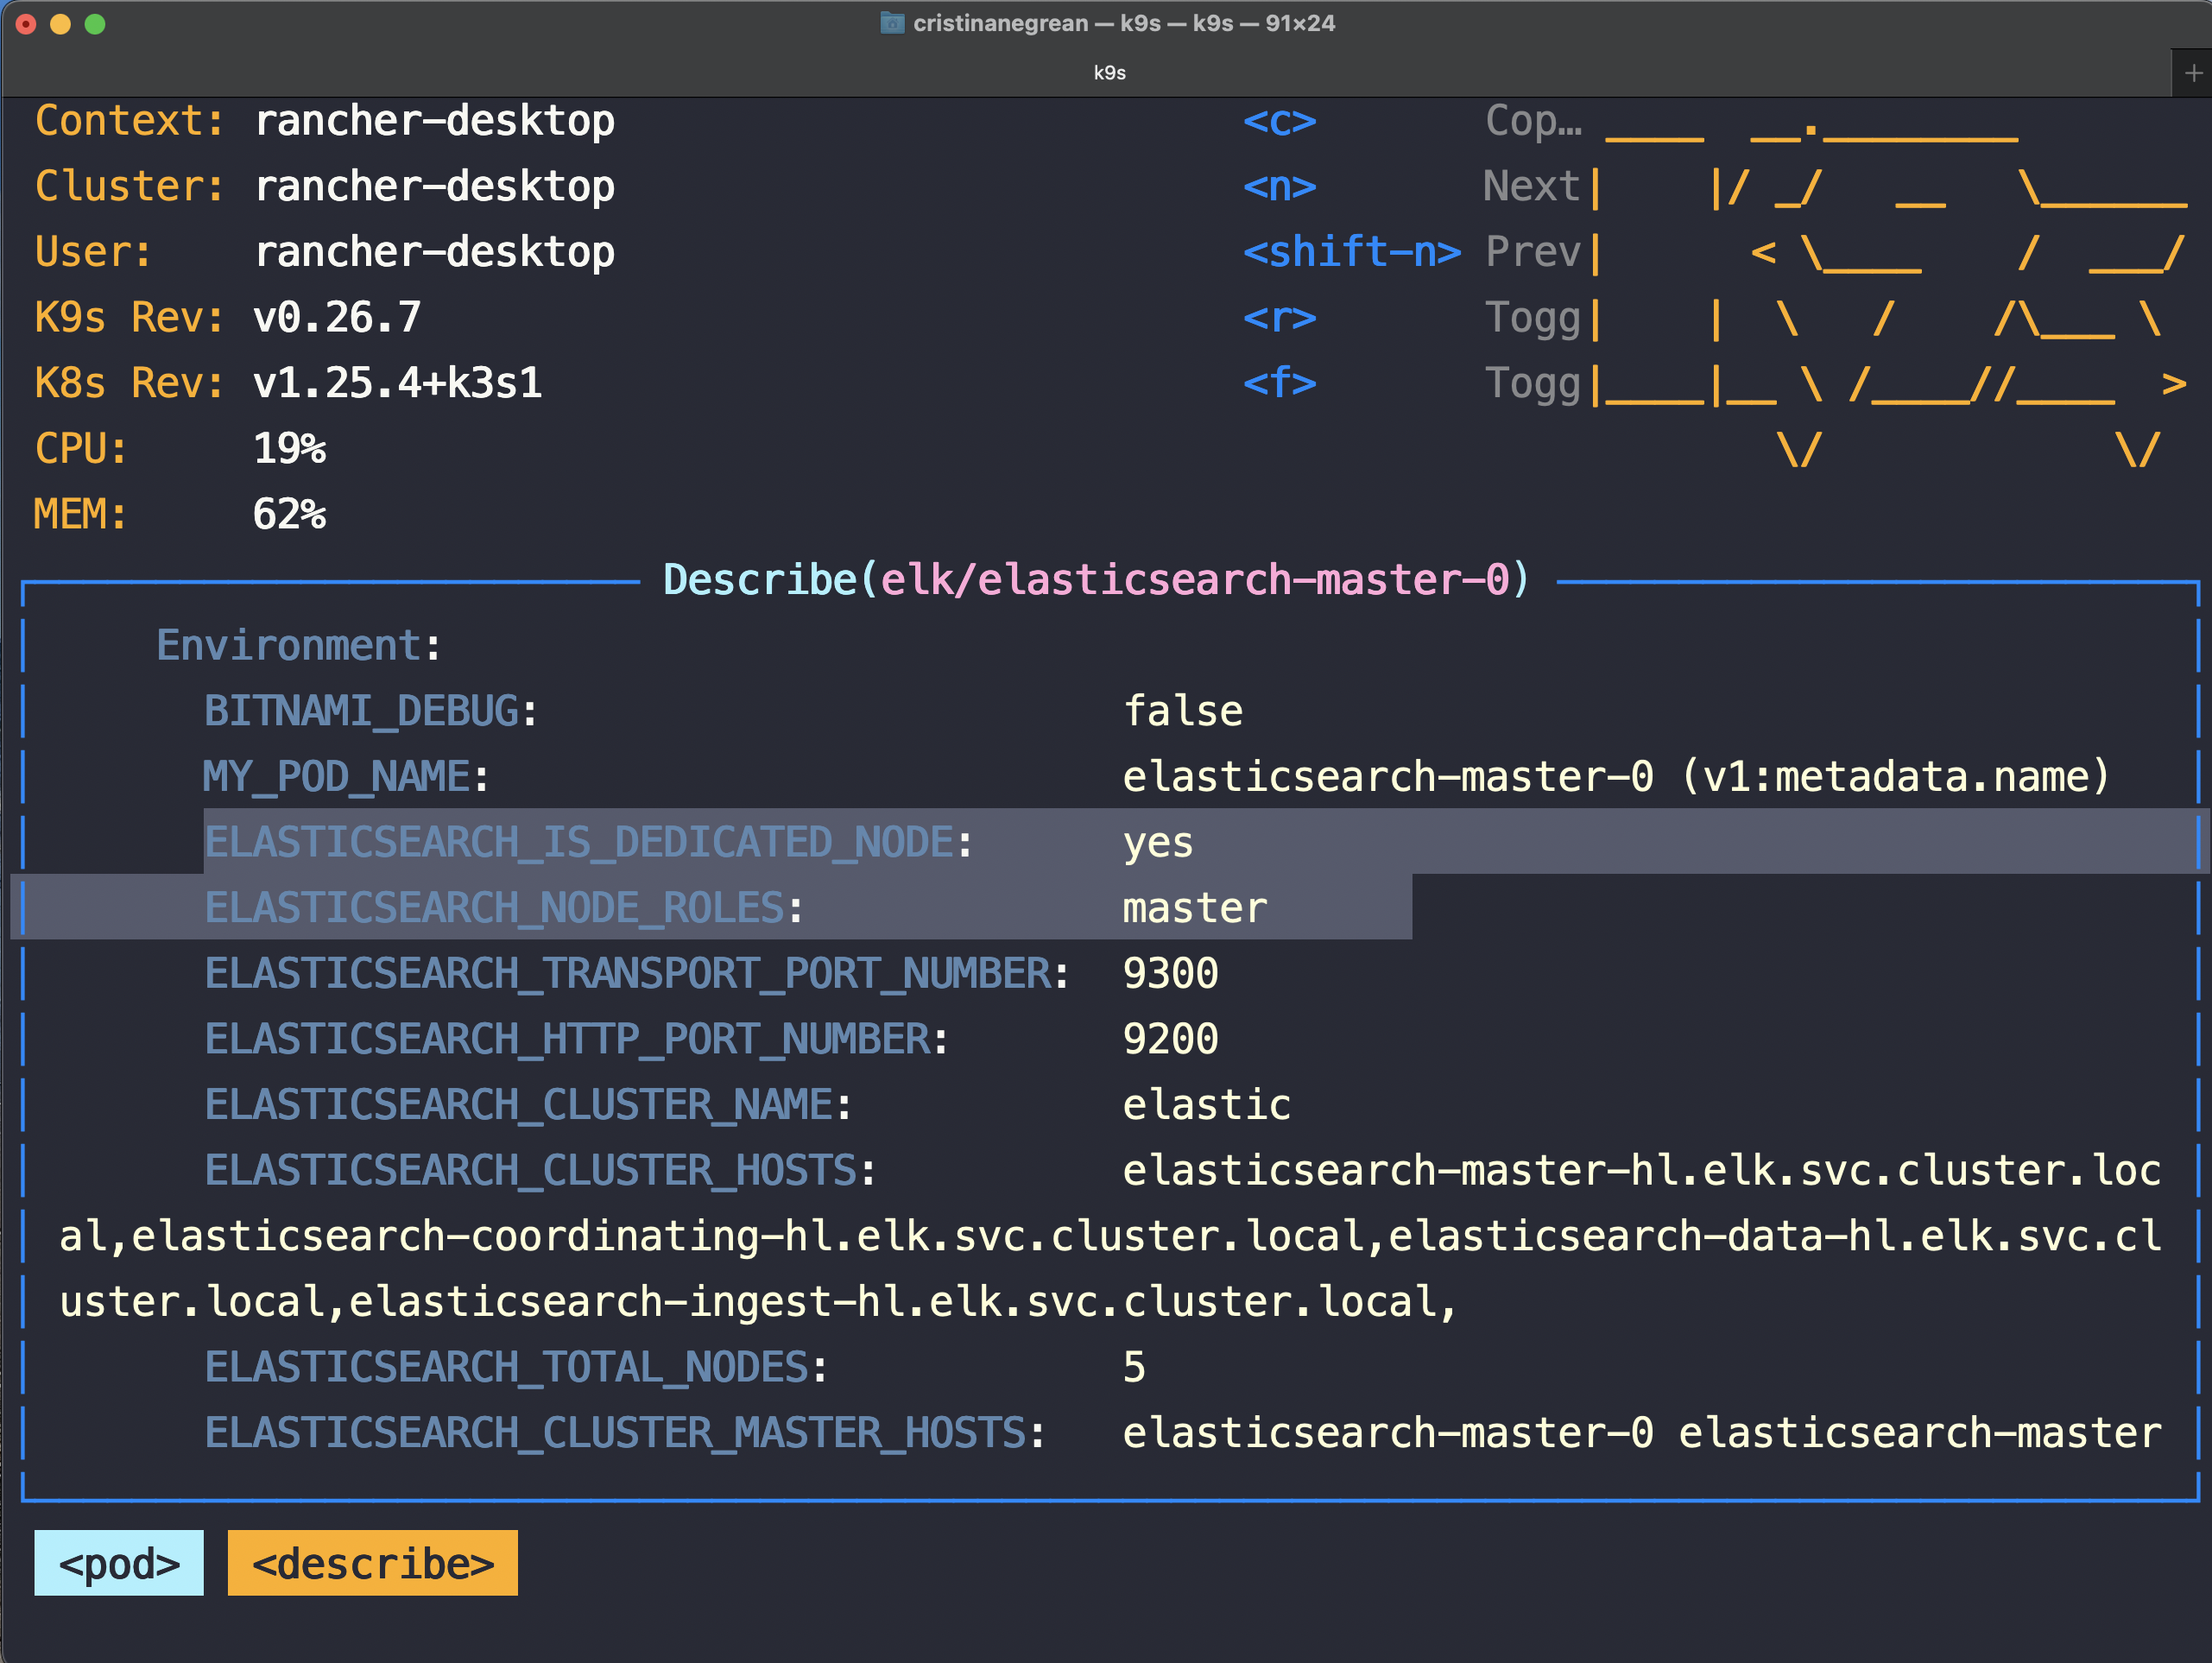
Every cluster needs to have nodes with master and data roles assigned. In the example installation, the three master eligible nodes are dedicated master-eligible nodes:
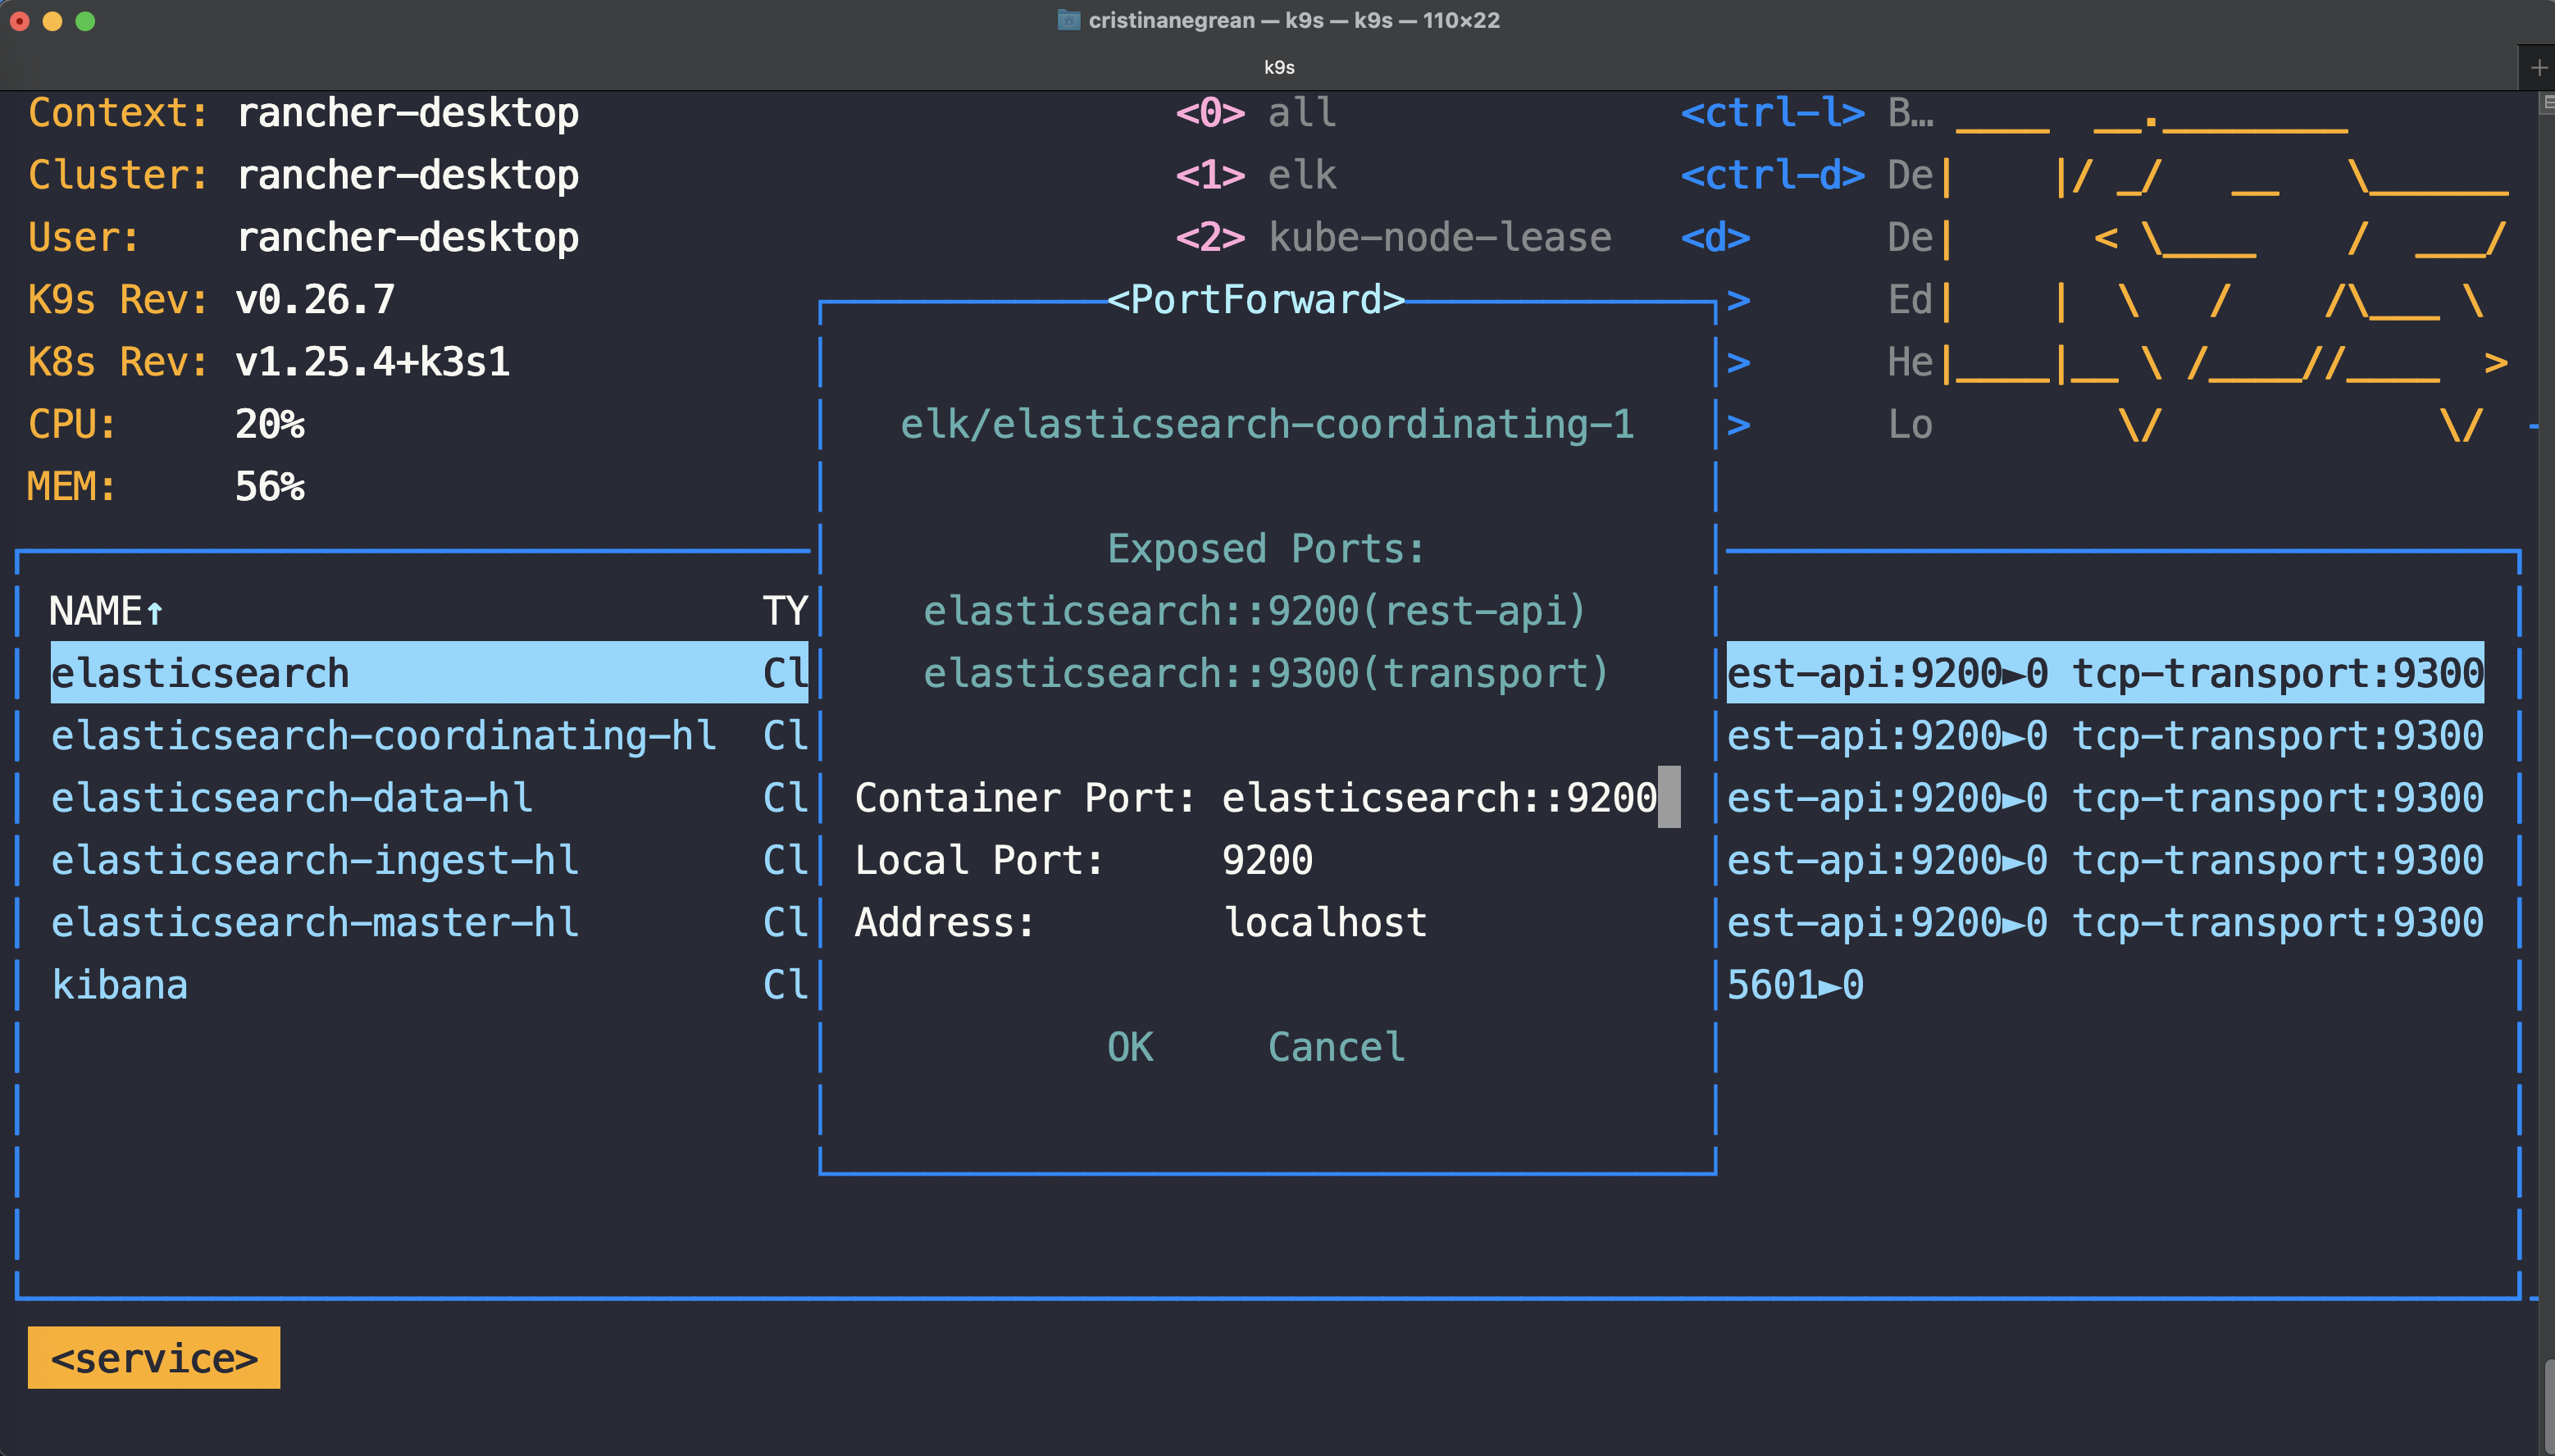
You can then port forward in k9s or using kubectl port-forward --namespace elk svc/elasticsearch 9200:9200 to test your installation:
➜  ~ curl http://localhost:9200
{
  "name" : "elasticsearch-coordinating-1",
  "cluster_name" : "elastic",
  "cluster_uuid" : "IpIkCNYuReC2AEH9CqyfGA",
  "version" : {
    "number" : "8.6.0",
    "build_flavor" : "default",
    "build_type" : "tar",
    "build_hash" : "f67ef2df40237445caa70e2fef79471cc608d70d",
    "build_date" : "2023-01-04T09:35:21.782467981Z",
    "build_snapshot" : false,
    "lucene_version" : "9.4.2",
    "minimum_wire_compatibility_version" : "7.17.0",
    "minimum_index_compatibility_version" : "7.0.0"
  },
  "tagline" : "You Know, for Search"
}
➜  ~
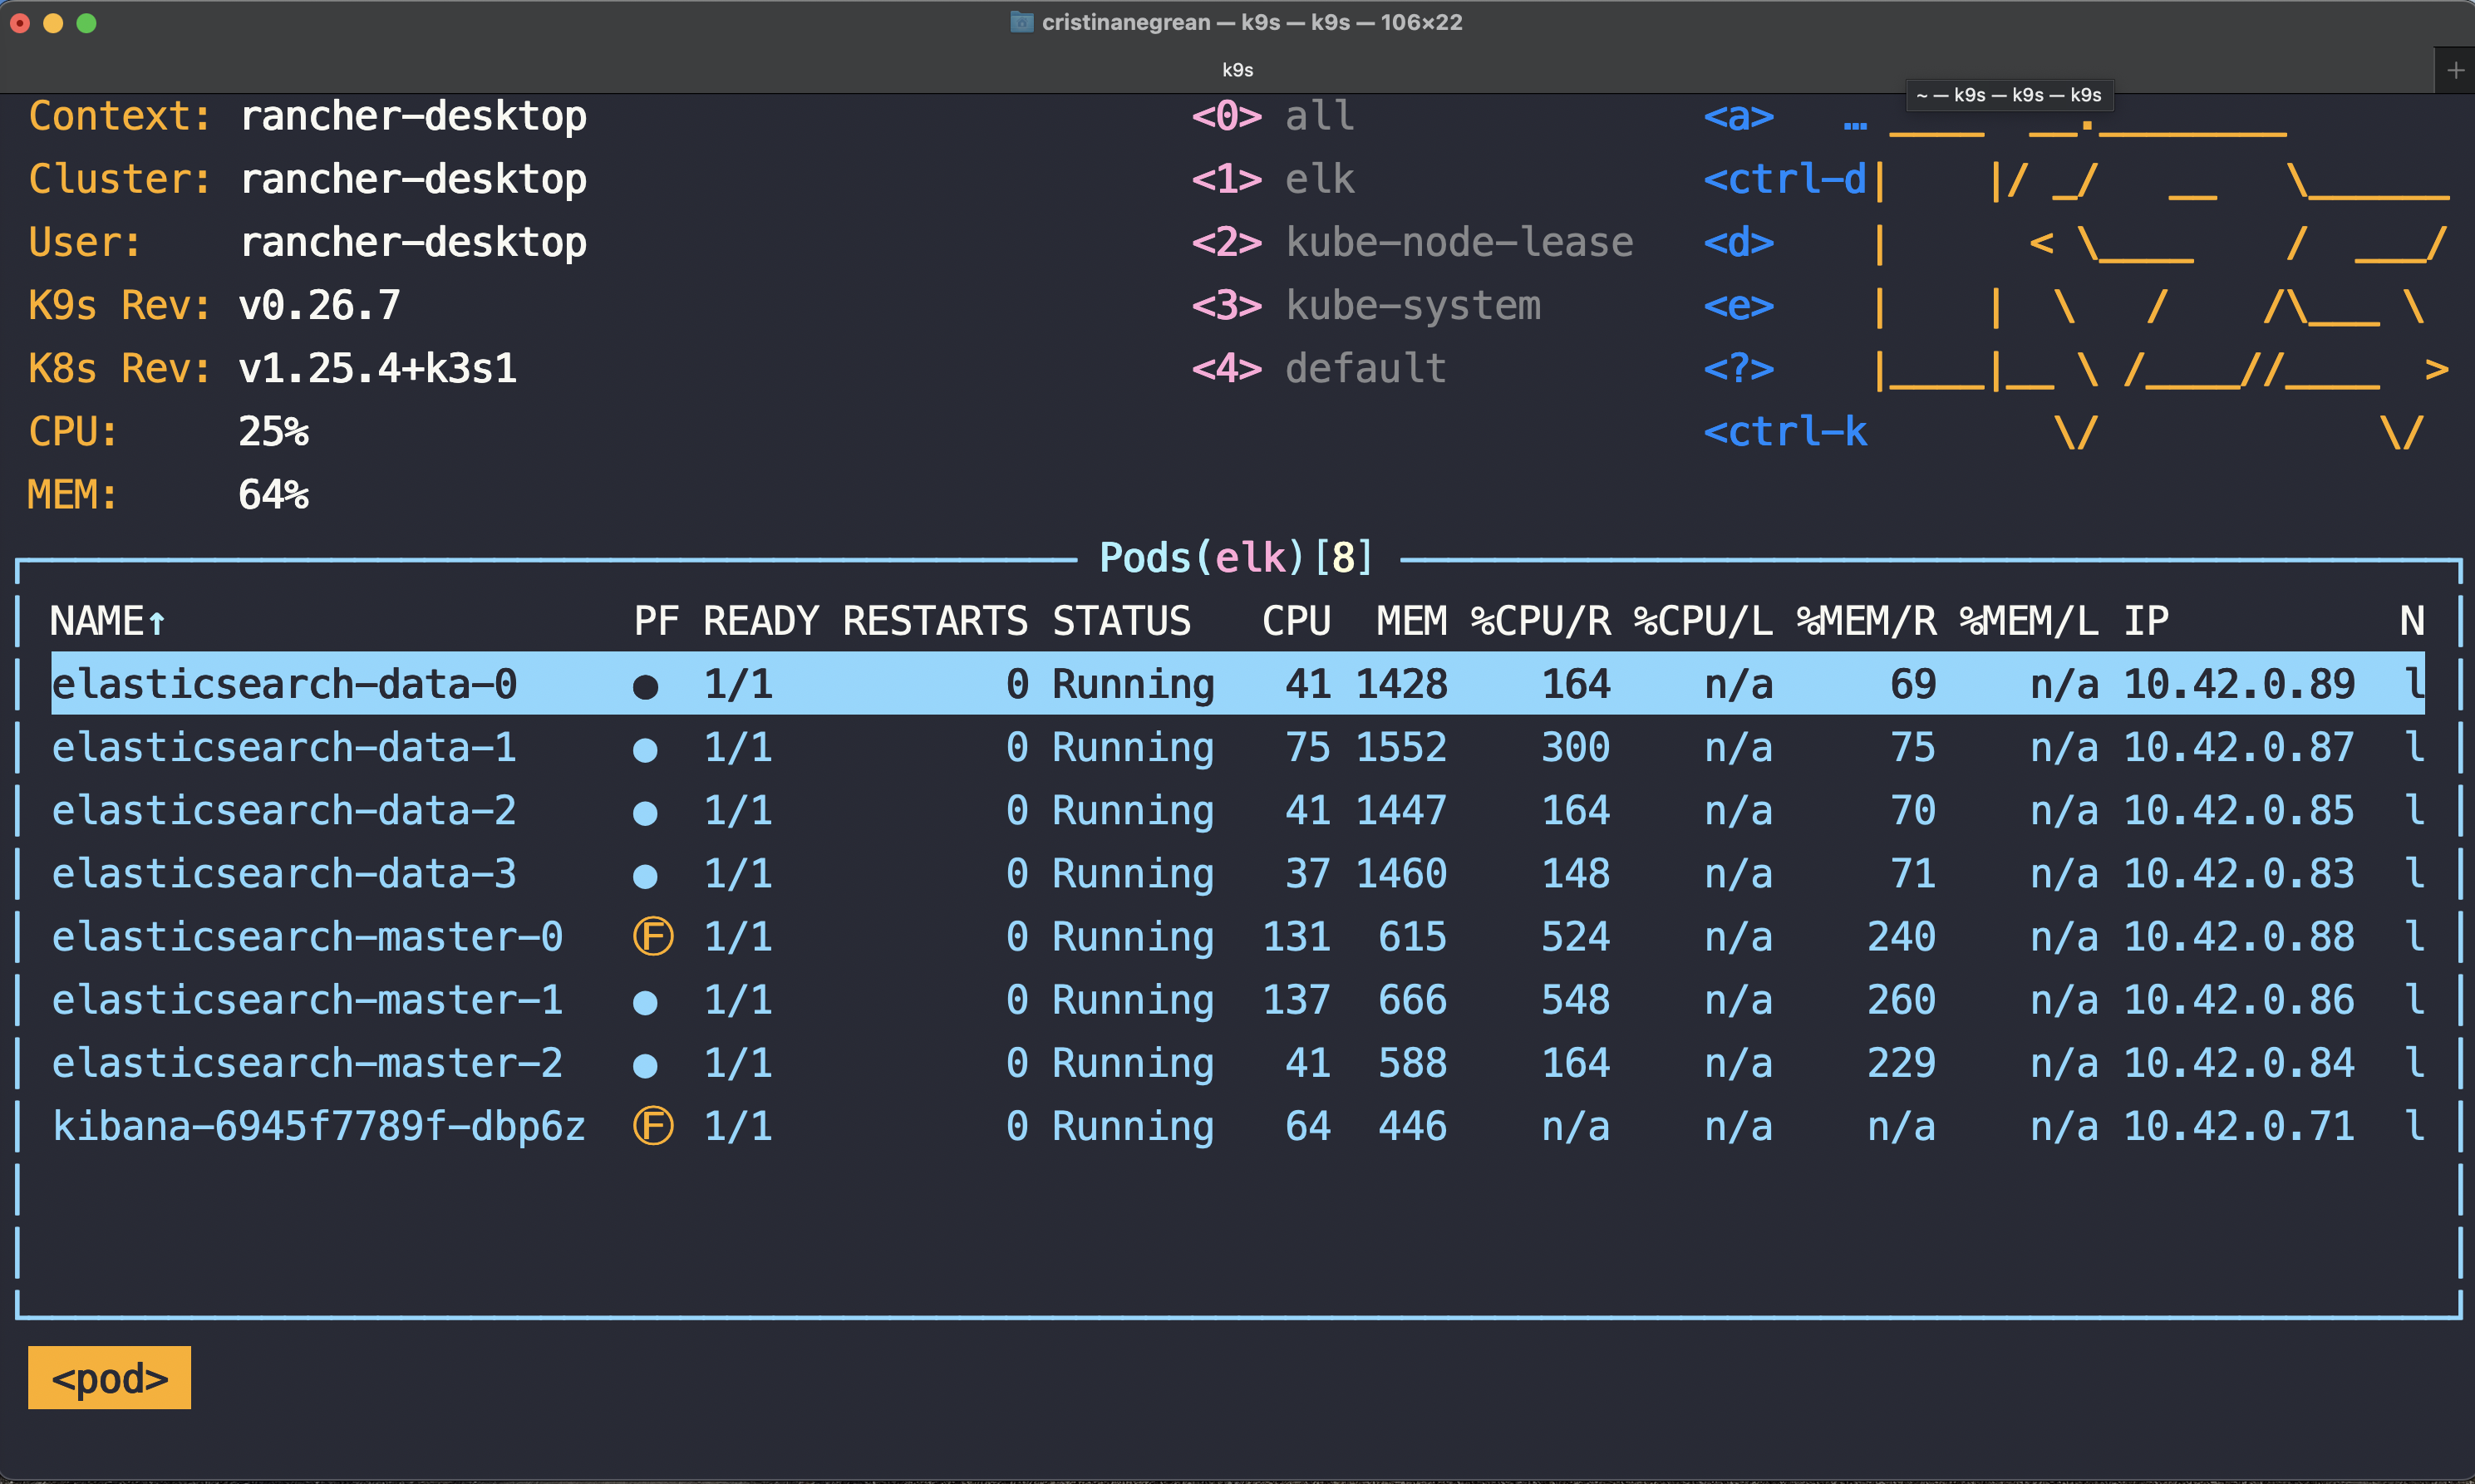
You can tweak the deployment according to your use-case. For example, I will disable the creation of the ingestion and coordination only nodes, and provision four data nodes instead of two. Every node in the cluster has now implicitly a coordinating role.
➜  ~ helm upgrade --install elasticsearch --namespace=elk --set master.replicaCount=3,ingest.enabled=false,data.replicaCount=4,master.masterOnly=false,coordinating.replicaCount=0 bitnami/elasticsearch
Release "elasticsearch" has been upgraded. Happy Helming!
NAME: elasticsearch
LAST DEPLOYED: Mon Jan 16 21:42:21 2023
NAMESPACE: elk
STATUS: deployed
REVISION: 4
TEST SUITE: None
NOTES:
CHART NAME: elasticsearch
CHART VERSION: 19.5.8
APP VERSION: 8.6.0
Installing Kibana
Before installing Kibana using as well a prebuilt helm chart from Bitnami I’ve created a small manifest file named kibana-values.yaml. It contains the details on how Kibana should reach the ElasticSearch installation:
elasticsearch:
  hosts: [elasticsearch.elk.svc.cluster.local]
  port: 9200
[Listing of kibana-values.yaml]
➜  ~ helm upgrade --install kibana --values kibana-values.yaml --namespace elk bitnami/kibana
Release "kibana" has been upgraded. Happy Helming!
NAME: kibana
LAST DEPLOYED: Sun Jan 15 20:47:59 2023
NAMESPACE: elk
STATUS: deployed
REVISION: 3
TEST SUITE: None
NOTES:
CHART NAME: kibana
CHART VERSION: 10.2.12
APP VERSION: 8.6.0
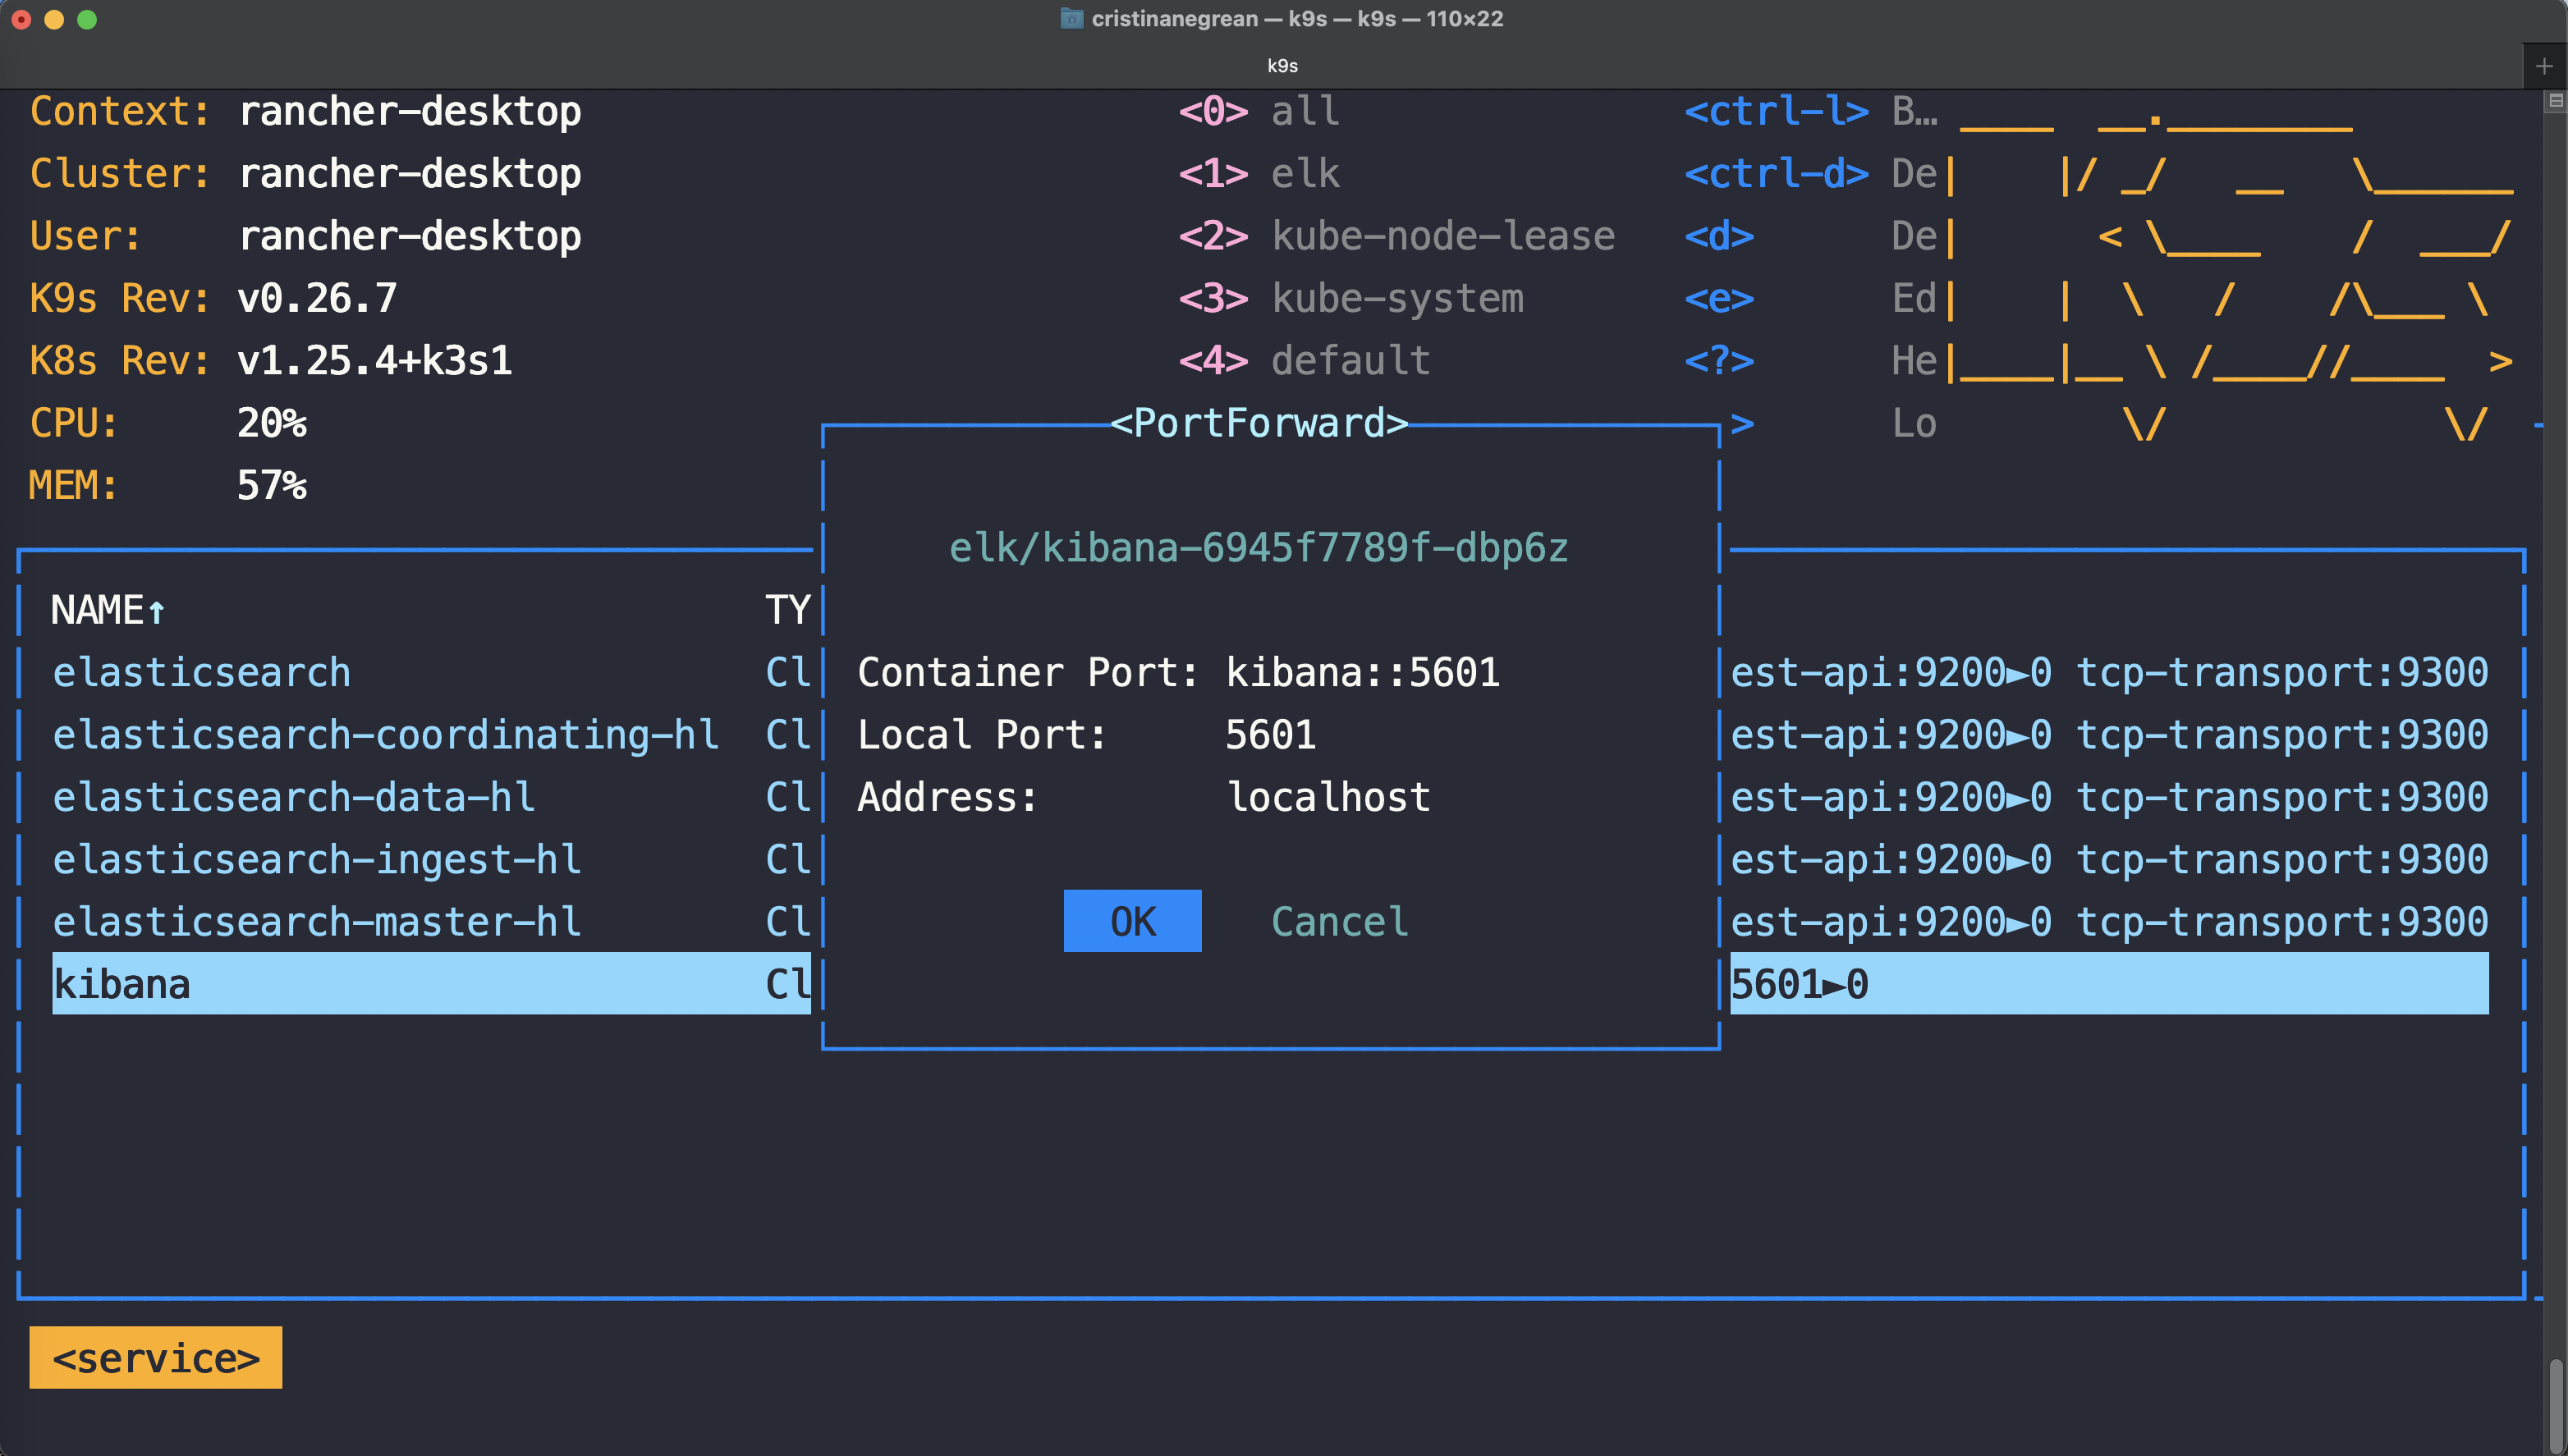
After the above installation completes you can use k9s or kubectl port-forward --namespace elk svc/kibana 5601:5601 and open Kibana dashboard in your favorite browser:

Conclusion
After following this tutorial, you should have an Elasticsearch cluster and Kibana deployed on Lightweight Kubernetes on your own machine.
Happy searching!


